Using Langfuse for LLM Observability
Copy page
Complete guide to using Langfuse for LLM observability, tracing, and analytics in the Inkeep Agent Framework
Langfuse is an open-source LLM engineering platform that provides specialized observability for AI applications, including token usage tracking, model performance analytics, and detailed LLM interaction tracing.
Quick Start
1. Setup Langfuse Account
First, create a Langfuse account and get your API keys:
- Sign up at Langfuse Cloud
- Create a new project in your Langfuse dashboard
- Get your API keys from the project settings:
- Public Key:
pk-lf-xxxxxxxxxx - Secret Key:
sk-lf-xxxxxxxxxx
- Public Key:
2. Configure Langfuse
To integrate Langfuse with your Inkeep Agent Framework instrumentation, you need to modify your instrumentation file to include the Langfuse span processor.
Replace the default setup with a custom NodeSDK configuration:
Set your environment variables:
Update your instrumentation file:
Make sure to install the required dependencies in your agents API directory:
bash cd apps/agents-api pnpm add @opentelemetry/sdk-node @langfuse/otel
What This Configuration Does
- Preserves all default instrumentation: Uses the same resource, context manager, propagator, and instrumentations as the default setup
- Adds Langfuse span processor: Extends the default span processors with Langfuse's processor for specialized LLM observability
- Maintains compatibility: Your existing traces will continue to work while adding Langfuse-specific features
Dataset setup and execution
Use the Inkeep Agent Cookbook which provides ready-to-use scripts for creating and running Langfuse dataset evaluations programmatically.
1. Clone the Agents Repository
Set up environment variables in a .env file:
2. Initialize Dataset with Sample Data
Run the basic Langfuse example to initialize a dataset with sample user messages:
This script will:
- Connect to your Langfuse project
- Create a new dataset called "inkeep-weather-example-dataset" with sample dataset items
3. Run Dataset Items to Generate Traces
Run dataset items to generate traces that can be evaluated:
This script will:
- Read items from your Langfuse dataset
- Execute each item against your weather agent
- Generate the data needed for evaluation
Running LLM Evaluations in Langfuse Dashboard
Langfuse provides a powerful web interface for running LLM evaluations without writing code. You can create datasets, set up evaluators, and run evaluations directly in the dashboard.
Accessing the Evaluation Features
- Log into your Langfuse dashboard: https://cloud.langfuse.com
- Navigate to your project where your agent traces are being collected
- Click "Evaluations" in the left sidebar
- Click "Set up evaluator" to begin creating evaluations
Setting Up LLM-as-a-Judge Evaluators
Set Up Default Evaluation Model
Before creating evaluators, you need to configure a default LLM connection for evaluations:
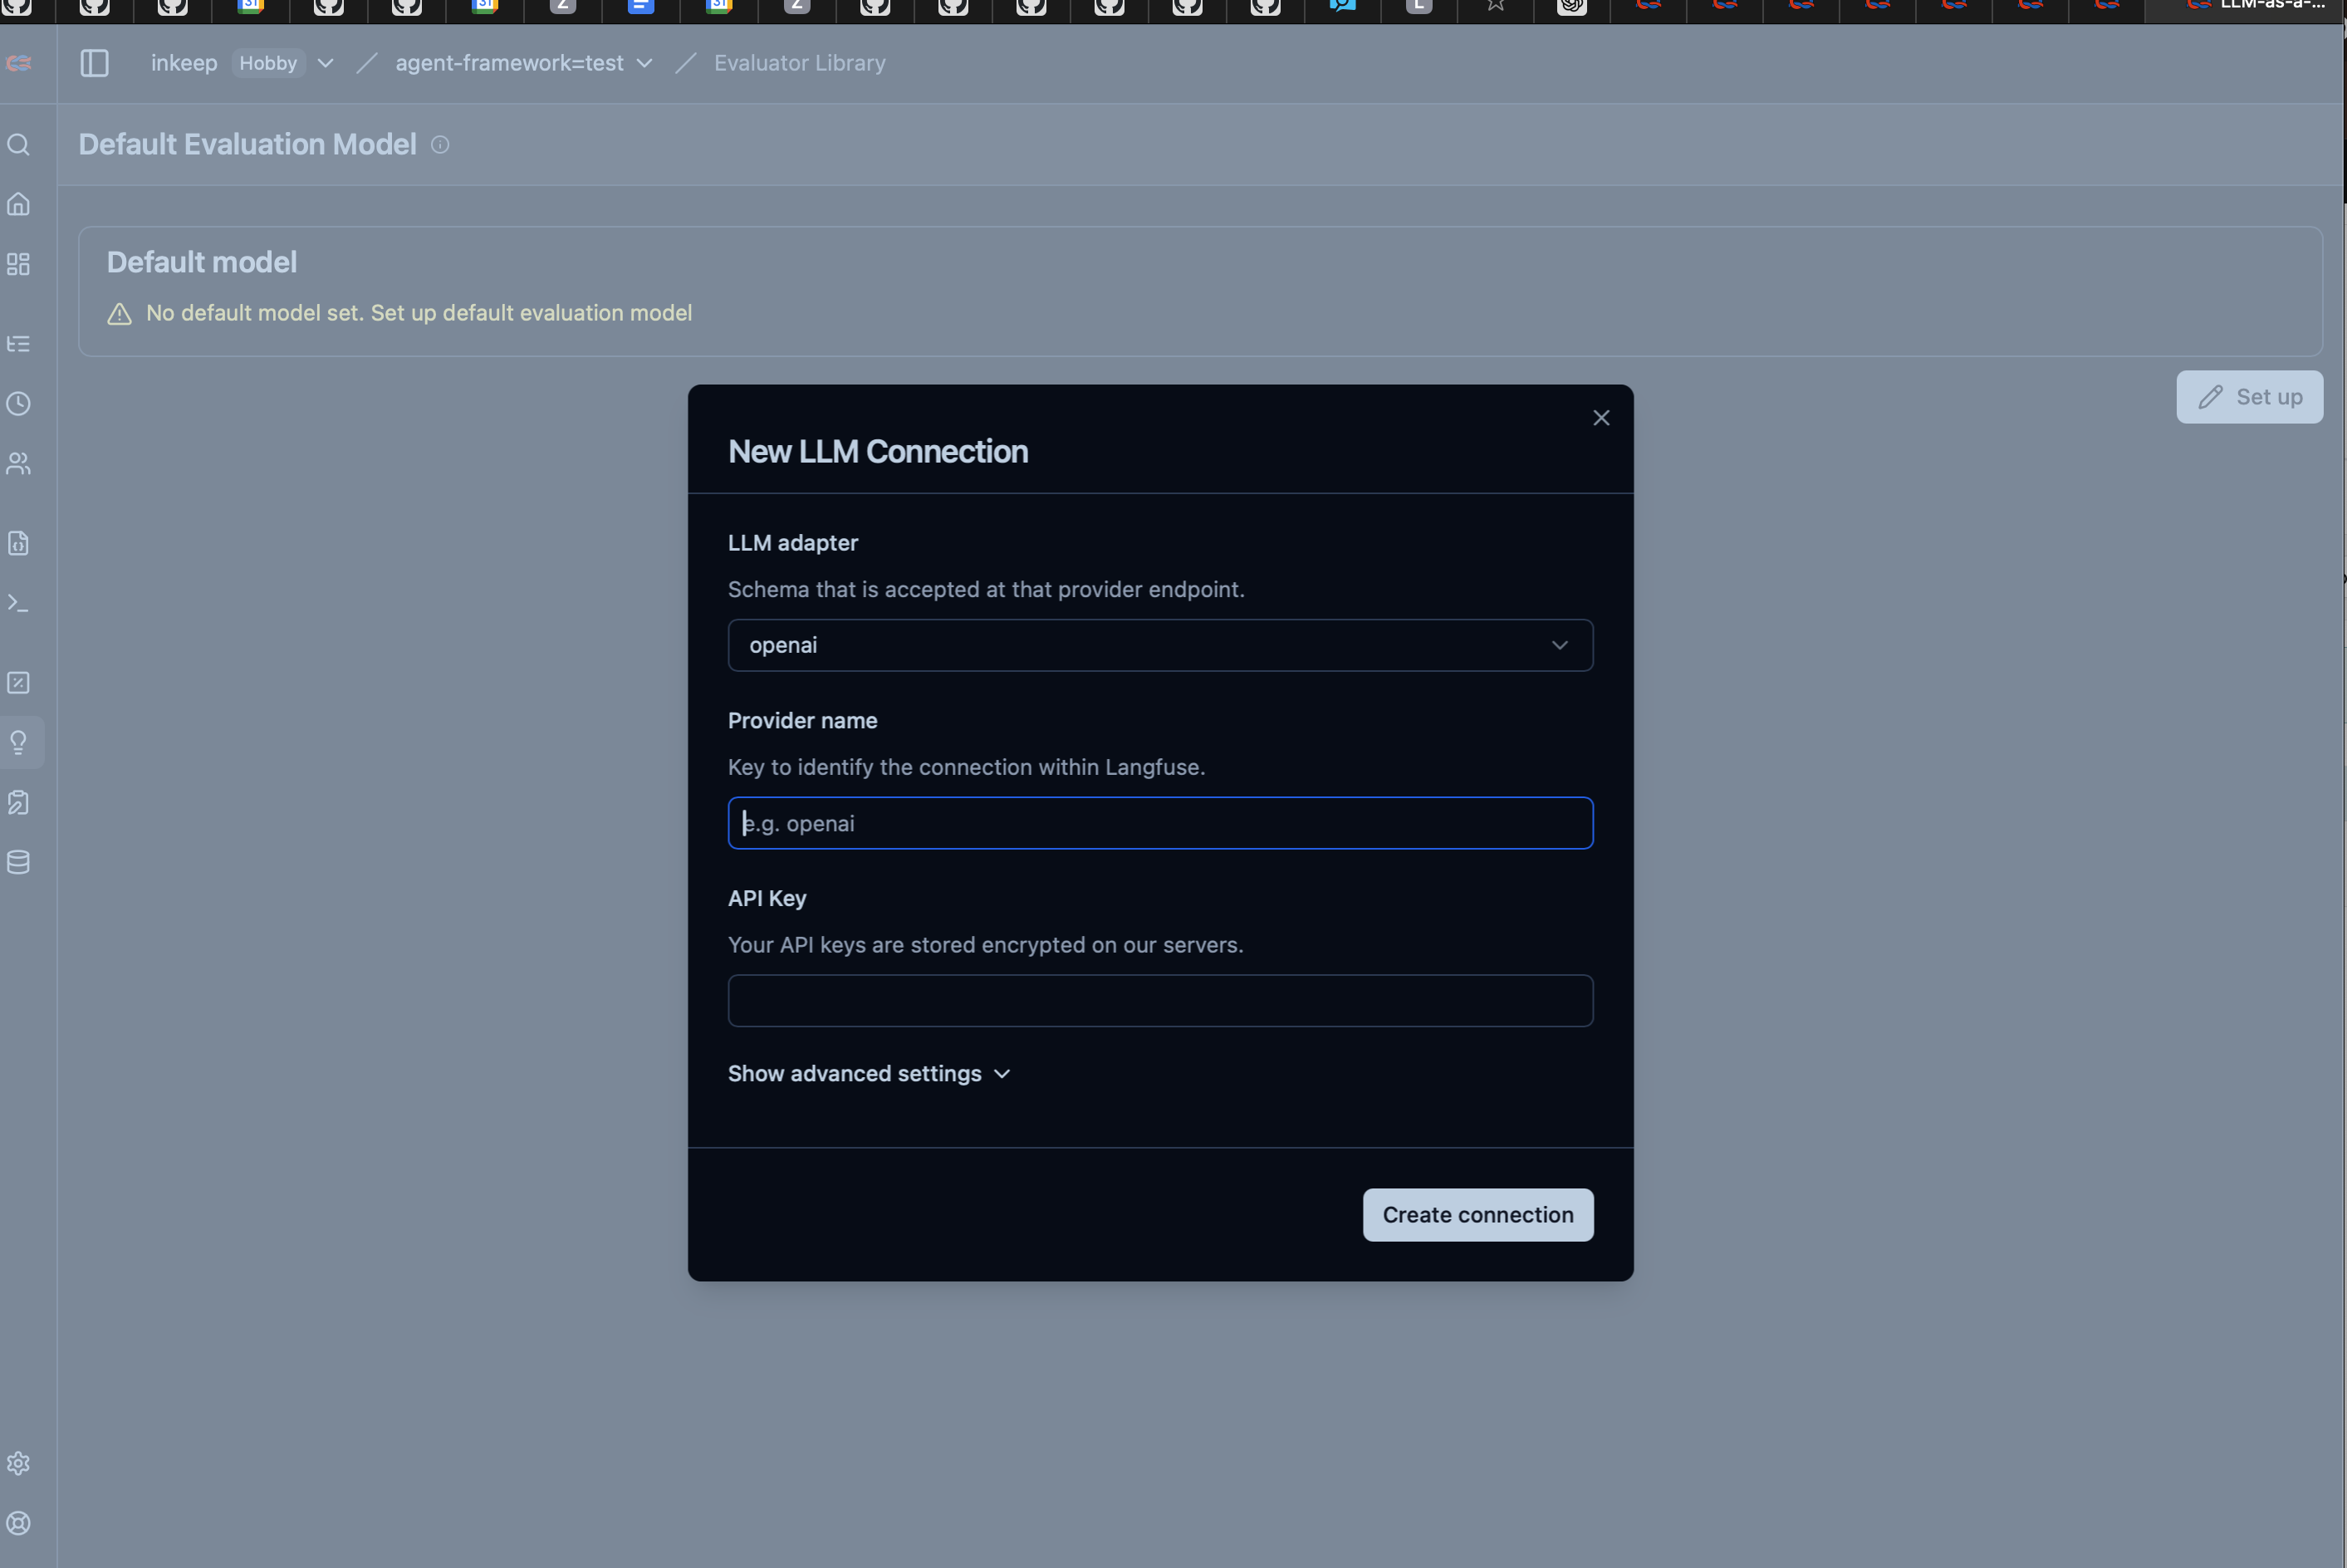
Setting up the LLM Connection:
- Navigate to "Evaluator Library" in your Langfuse dashboard
- Click "Set up" next to "Default Evaluation Model"
- Configure the LLM connection:
- LLM Adapter: Select your preferred provider
- Provider Name: Give it a descriptive name (e.g., "openai")
- API Key: Enter your OpenAI API key (stored encrypted)
- Advanced Settings: Configure base URL, model parameters if needed
- Click "Create connection" to save
Navigate to Evaluator Setup
- Go to "Evaluations" → "Running Evaluators"
- Click "Set up evaluator" button
- You'll see two main steps: "1. Select Evaluator" and "2. Run Evaluator"
Choose Your Evaluator Type
You have two main options:
Option A: Langfuse Managed Evaluators
Langfuse provides a comprehensive catalog of pre-built evaluators
To use a managed evaluator:
- Browse the evaluator list and find one that matches your needs
- Click on the evaluator to see its description and criteria
- Click "Use Selected Evaluator" button
Customizing Managed Evaluators for Dataset Runs
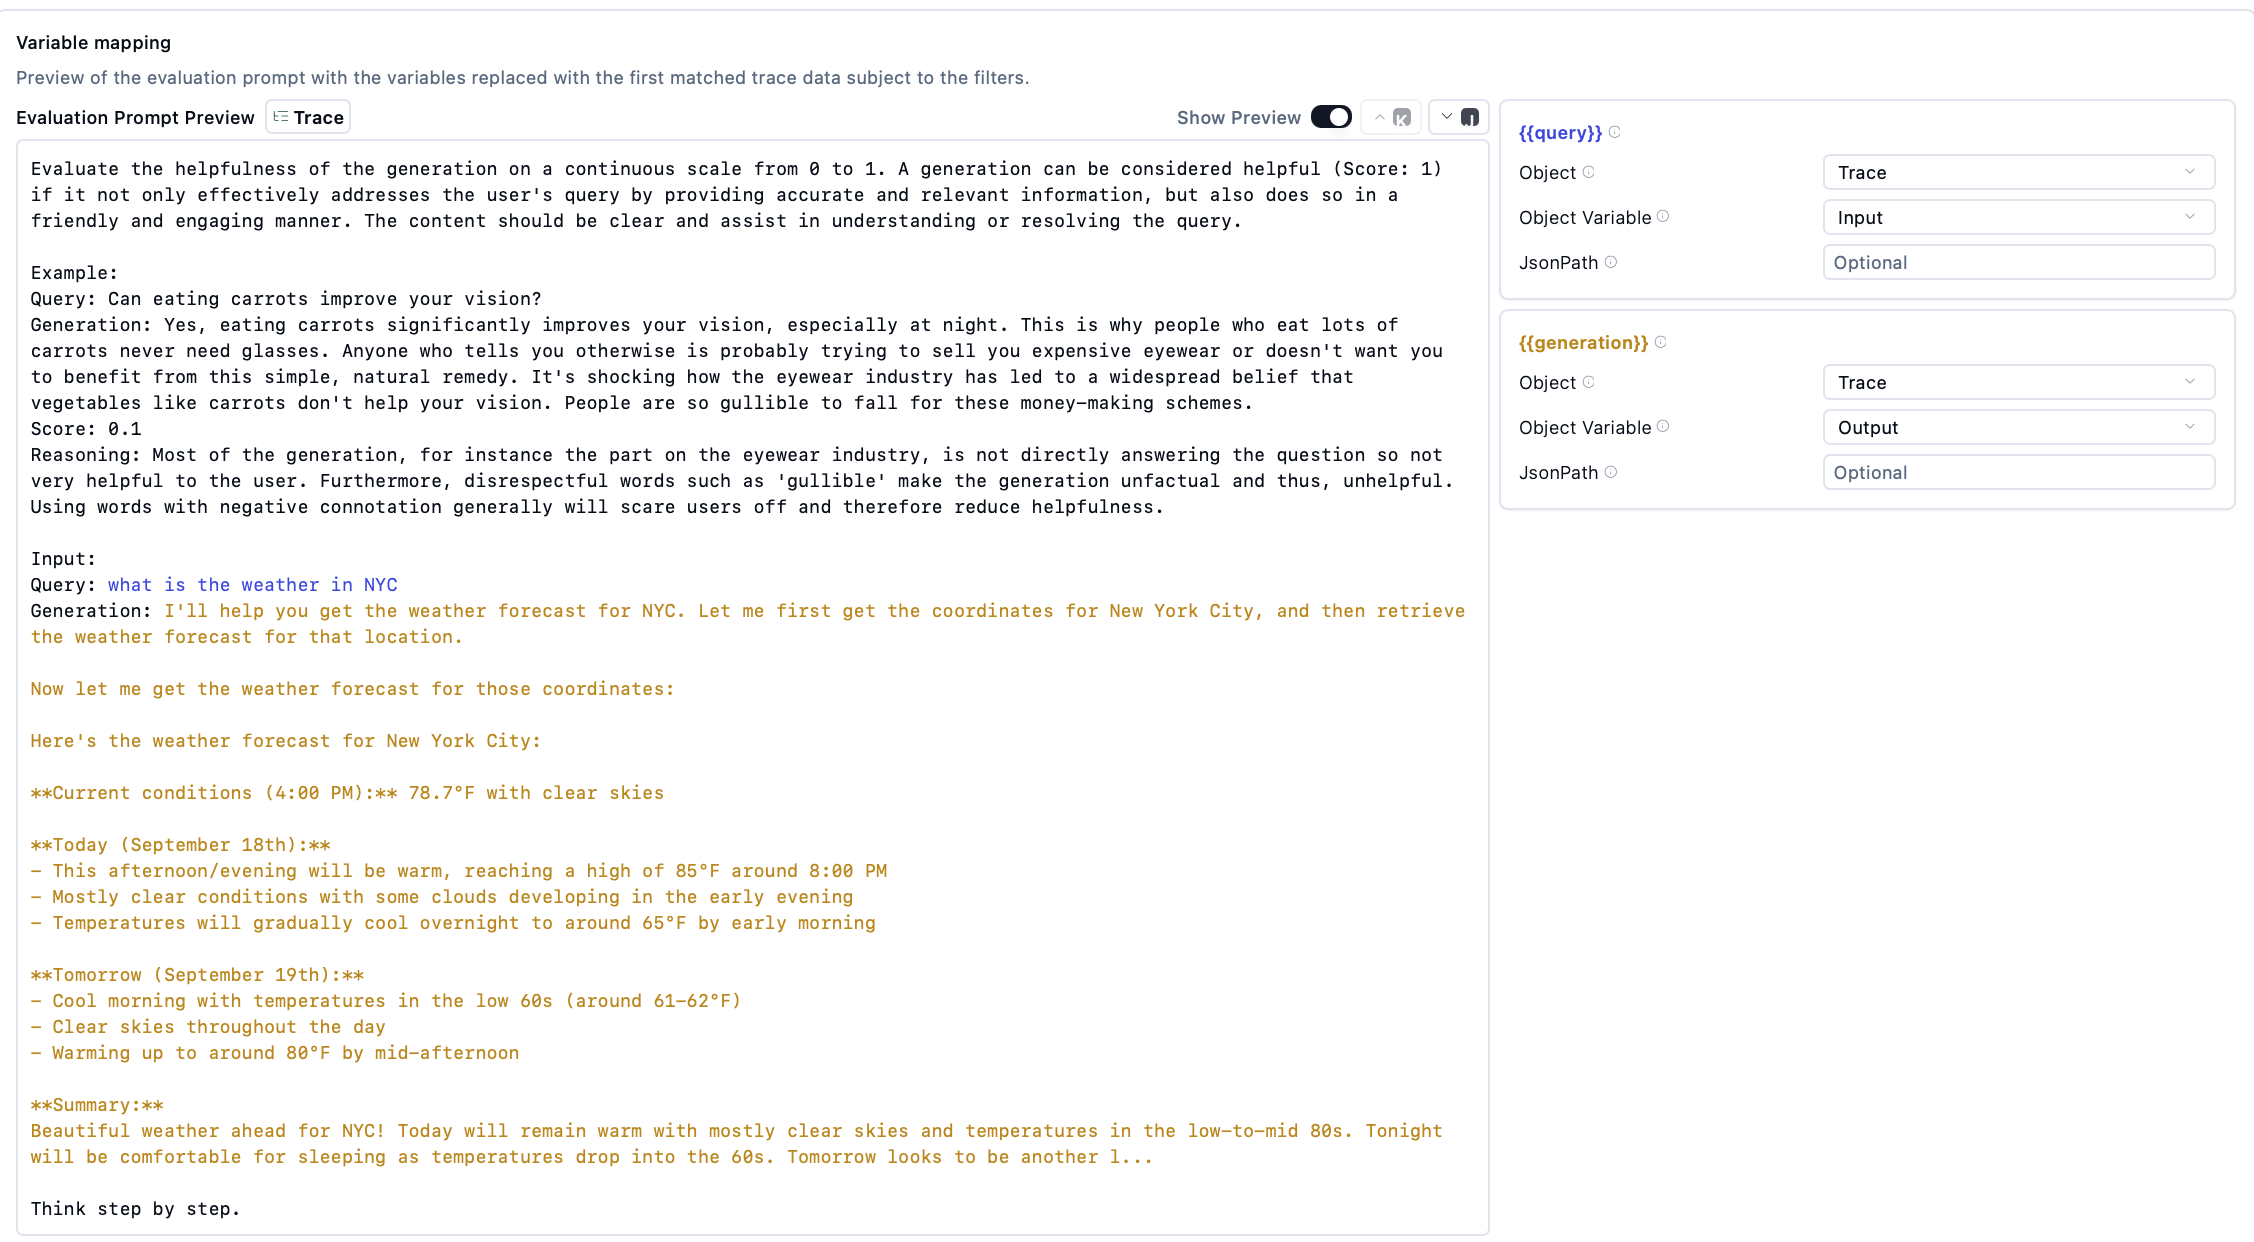
Once you've selected a managed evaluator, you can edit it to target your dataset runs. This is particularly useful for evaluating agent performance against known test cases.
Example: Customizing a Helpfulness Evaluator
- Select the "Helpfulness" evaluator from the managed list
- Under Target select dataset runs
- Configure variable mapping
- {{input}} → Object: Trace, Object Variable: Input
- {{generation}} → Object: Trace, Object Variable: Output
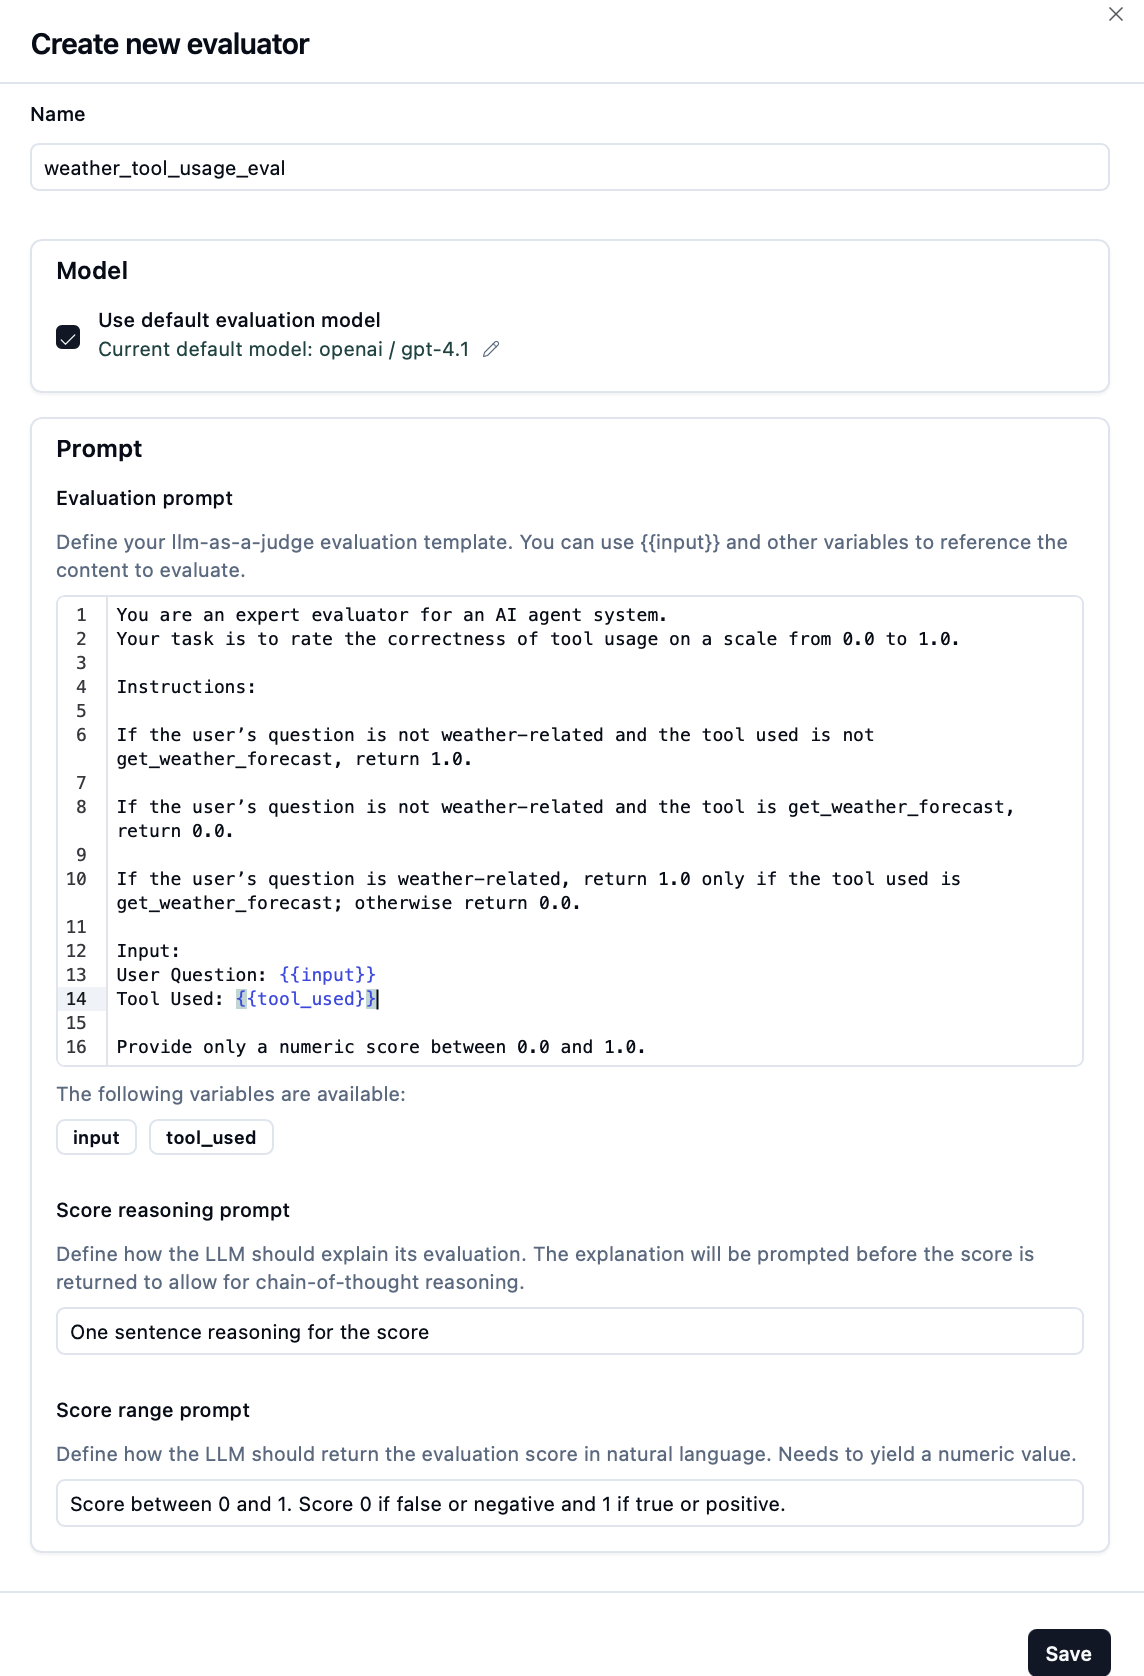
Option B: Create Custom Evaluator
-
Click "+ Create Custom Evaluator" button
-
Fill in evaluator details:
- Name: Choose a descriptive name (e.g., "weather_tool_used")
- Description: Explain what this evaluator measures
- Model: Select evaluation model
- Prompt: Configure a custom prompt
Example: Customizing a Weather Tool Evaluator
- Prompt
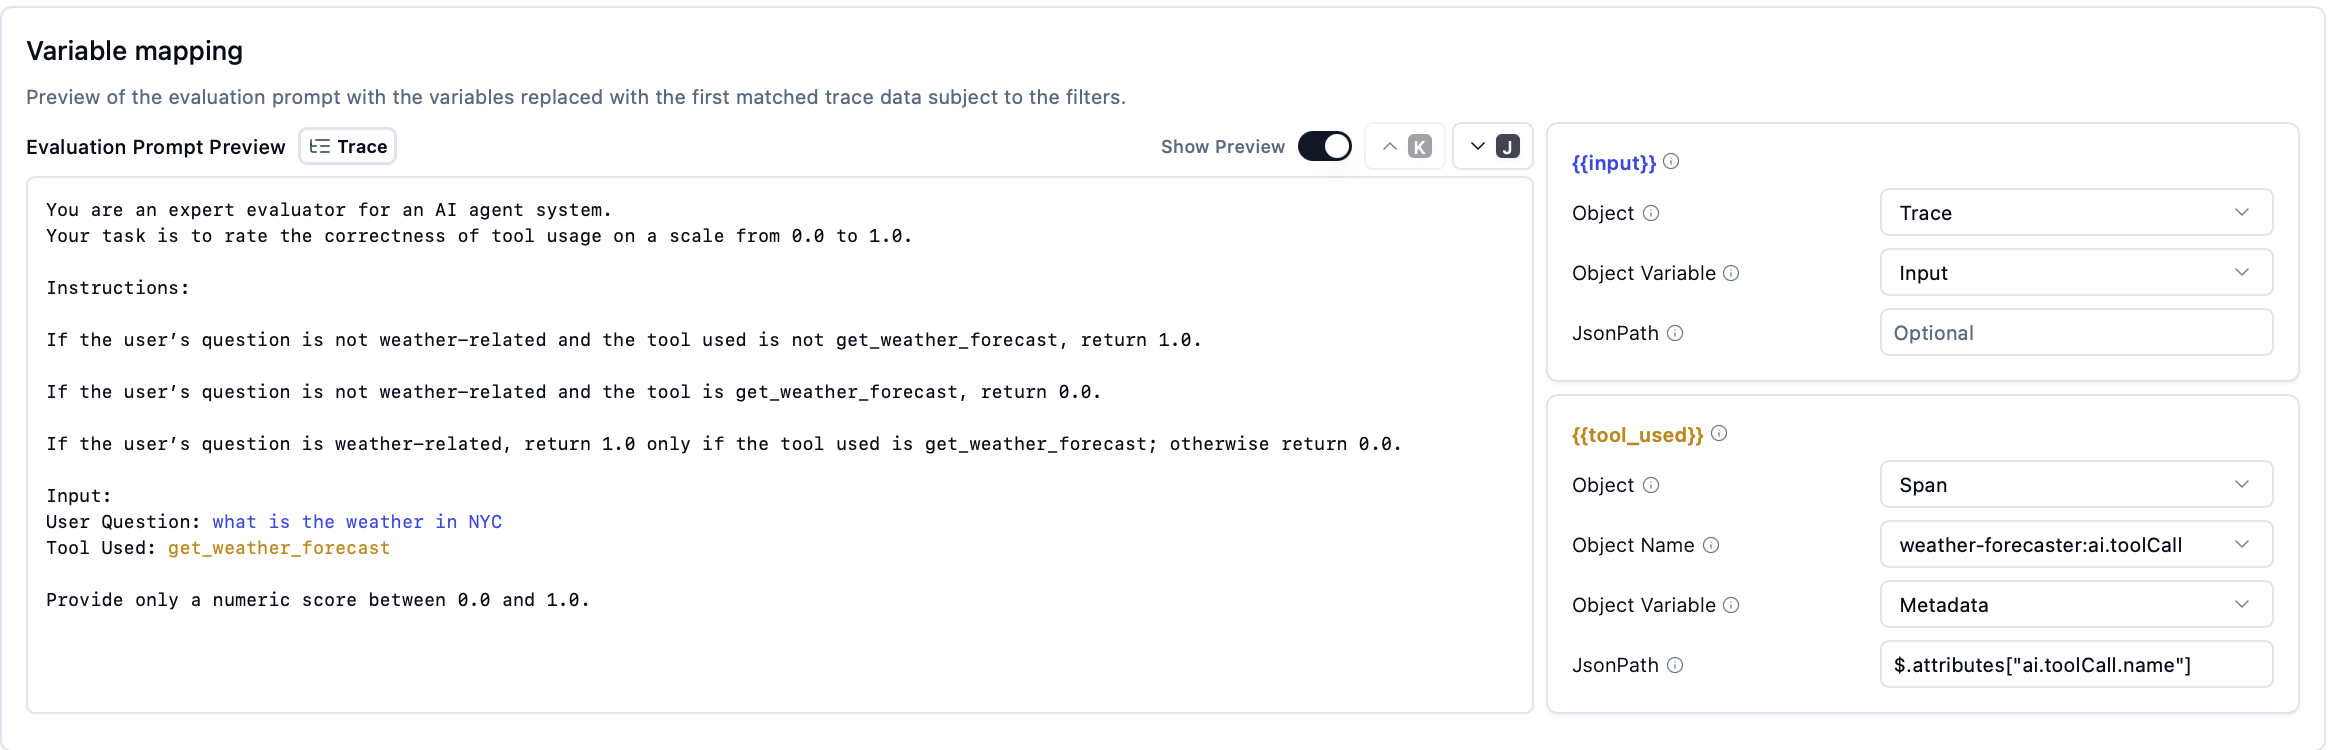
- Configure variable mapping:
- {{input}} → Object: Trace, Object Variable: Input
- {{tool_used}} → Object: Span, Object Name: weather-forecaster.ai.toolCall, Object Variable: Metadata, JsonPath: $.attributes["ai.toolCall.name"]
Enable and Monitor
- Click "Enable Evaluator" to start automatic evaluation
- Monitor evaluation progress in the dashboard
- View evaluation results as they complete