IntegrationsFramer

Add Embedded Chat to Framer

Integrate Inkeep's embedded chat into your Framer site for seamless user interaction.

What is Framer

Framer is a tool for creating interactive websites.

Get an API key

Follow these steps to create an API key for your web integration.

Connect the script

  1. Open Site Settings in the drop-down menu
  2. Click on the Open Settings tab
  3. Go to the General section
  4. Add the below to the Start of <head> tag section
<script
  id="inkeep-script"
  type="module"
  src="https://cdn.jsdelivr.net/npm/@inkeep/cxkit-js@0.5/dist/embed.js"
  defer
></script>

Creating the container

Add a widget container to the page using the built-in Framer functionality.

  1. Select an area to add a container
  2. Select the Embed item in the Utility section
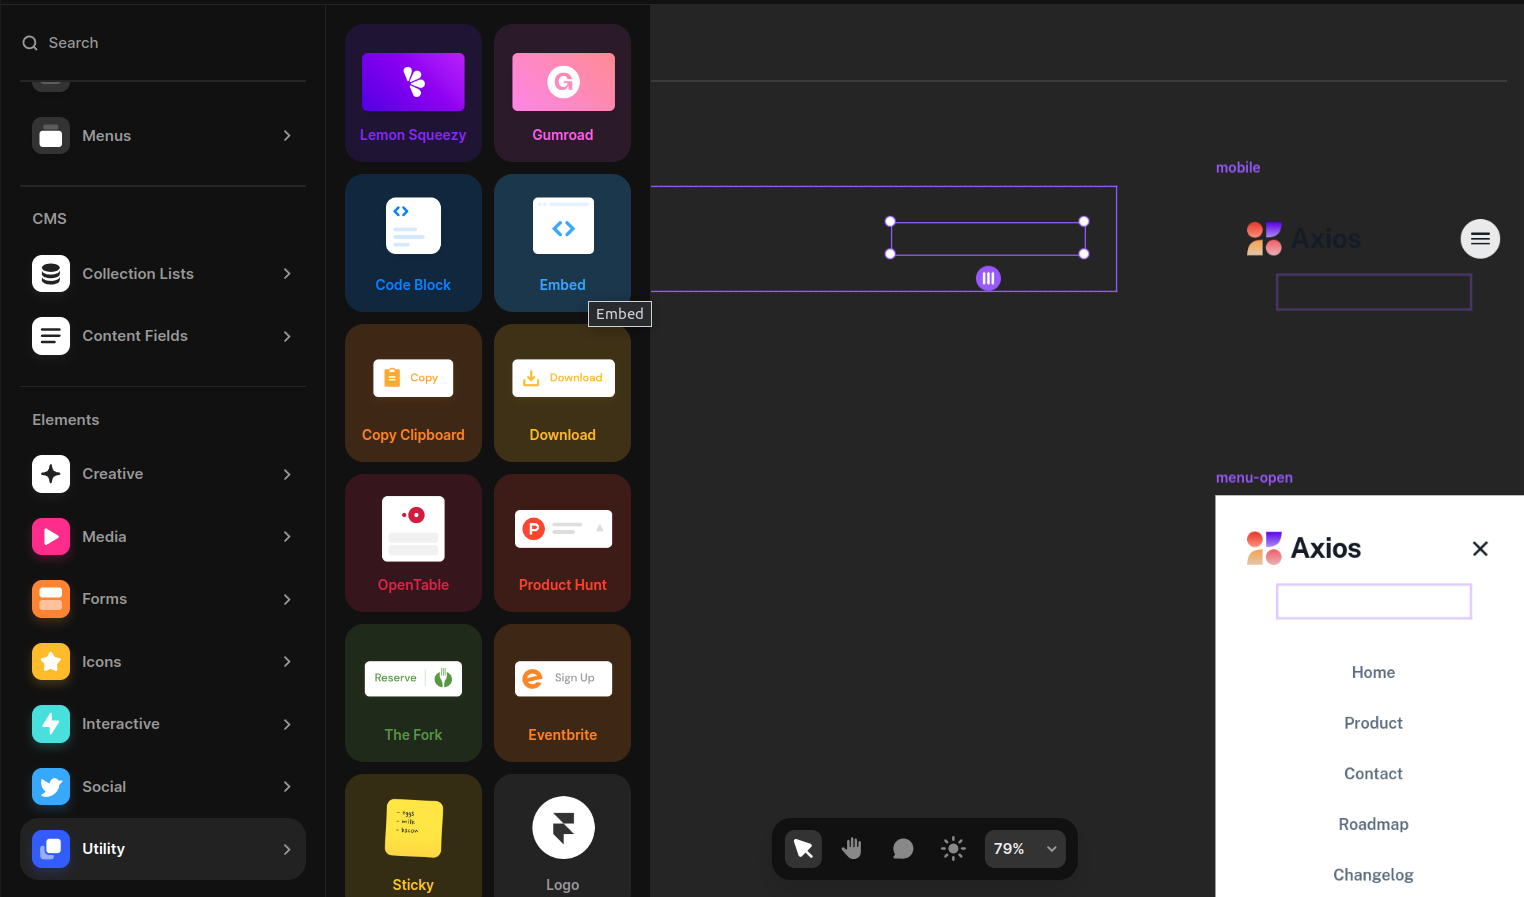
  1. Add an html element to the page
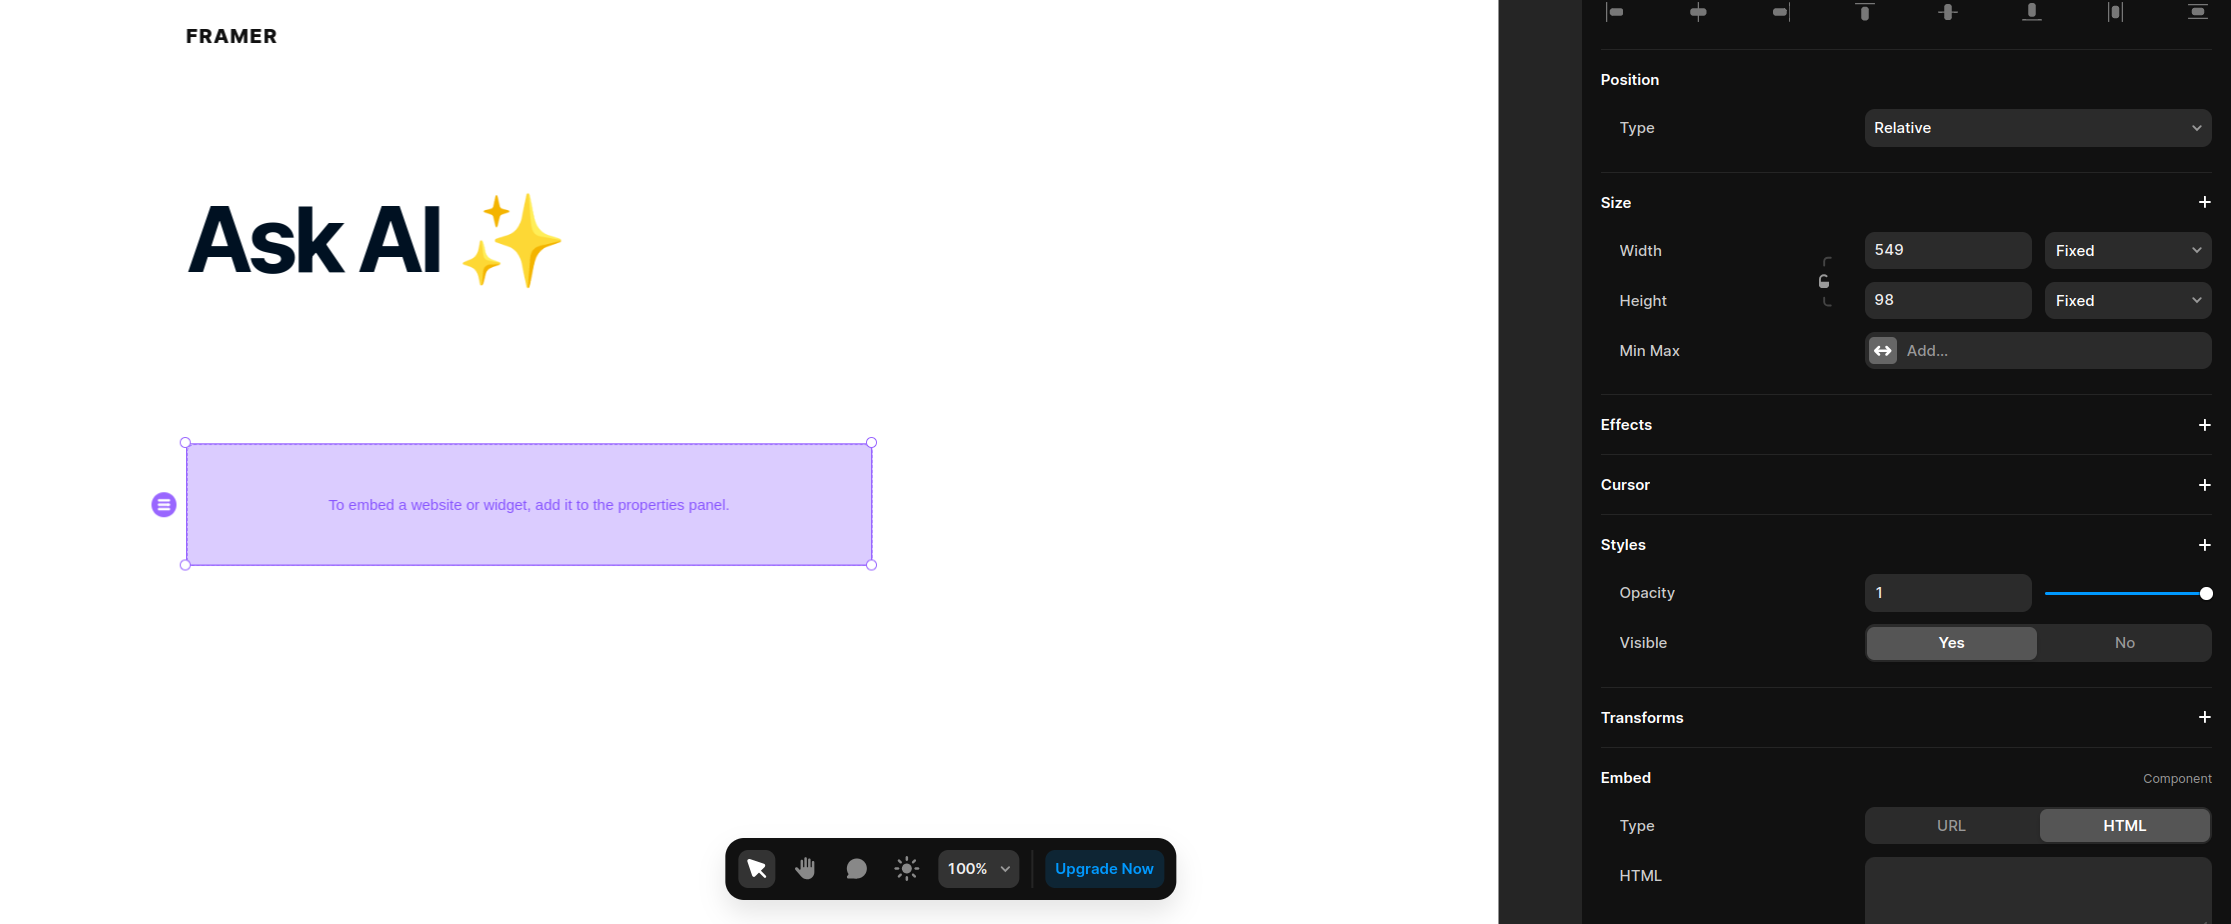
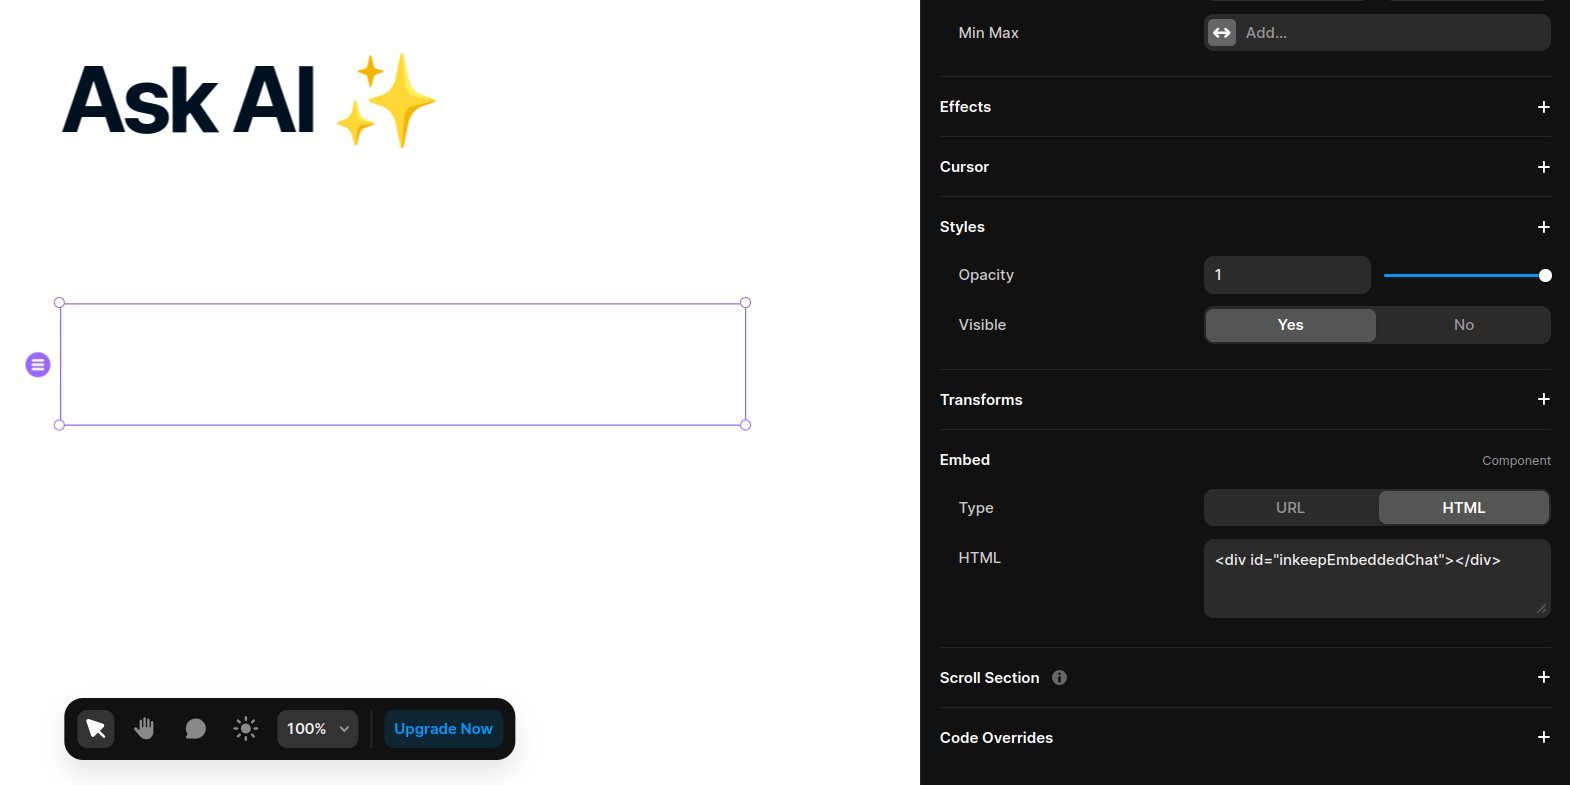
  1. Specify the ID of the container to be inkeepEmbeddedChat

Initialize the widget

For multi page sites

If your site is not a single page application (SPA), load the Inkeep script on the page with the Inkeep container element.

  1. Open Site Settings in the drop-down menu
  2. Click on the Open Settings tab
  3. Select the page that has the Inkeep container element (under the Page settings section)
  4. Next, paste the script below into the End of <body> tag section:
<script defer>
  const inkeepScript = document.getElementById("inkeep-script");
  // configure and initialize the widget
  const addInkeepWidget = () => {
    const inkeepWidget = Inkeep.EmbeddedChat("#inkeepEmbeddedChat", {
      baseSettings: {
        apiKey: "INKEEP_API_KEY", // required
        primaryBrandColor: "#26D6FF", // your brand color, widget color scheme is derived from this
        organizationDisplayName: "Inkeep",
        // ...optional settings,
        theme: {
          // optional path to a custom stylesheet
          styles: [
            {
              key: "main",
              type: "link",
              value: "/path/to/stylesheets",
            },
          ],
          // ...optional settings,
        },
      },
      modalSettings: {
        // optional settings
      },
      searchSettings: {
        // optional settings
      },
      aiChatSettings: {
        // optional settings
        aiAssistantAvatar: "https://mydomain.com/mylogo", // use your own AI assistant avatar
        exampleQuestions: [
          "Example question 1?",
          "Example question 2?",
          "Example question 3?",
        ],
      },
    });
  };
 
  inkeepScript.addEventListener("load", () => {
    if (document.body) addInkeepWidget(); // initialize the widget
  });
</script>

For single page sites (SPAs)

If your site is a single page application, you will need to load the Inkeep script in the <head> tag in the General section (that will be loaded on every page) and use the MutationObserver to track whether the inkeepEmbeddedChat element is in the DOM before initializing the widget (see example below).

  1. Open Site Settings in the drop-down menu
  2. Click on the Open Settings tab
  3. Go to the General section
  4. Next, paste the script below into the End of <body> tag section:
<script defer>
  const inkeepScript = document.getElementById("inkeep-script");
  // configure and initialize the widget
  const addInkeepWidget = () => {
    const targetElement = document.getElementById("inkeepEmbeddedChat");
 
    // Only initialize if the element exists and the widget hasn't been added yet
    if (targetElement && !targetElement.hasAttribute("data-inkeep-loaded")) {
      targetElement.setAttribute("data-inkeep-loaded", "true"); // Mark as loaded
      const inkeepWidget = Inkeep.EmbeddedChat("#inkeepEmbeddedChat", {
        baseSettings: {
          apiKey: "INKEEP_API_KEY", // required
          primaryBrandColor: "#26D6FF", // your brand color, widget color scheme is derived from this
          organizationDisplayName: "Inkeep",
          // ...optional settings,
          theme: {
            // optional path to a custom stylesheet
            styles: [
              {
                key: "main",
                type: "link",
                value: "/path/to/stylesheets",
              },
            ],
            // ...optional settings,
          },
        },
        modalSettings: {
          // optional settings
        },
        searchSettings: {
          // optional settings
        },
        aiChatSettings: {
          // optional settings
          aiAssistantAvatar: "https://mydomain.com/mylogo", // use your own AI assistant avatar
          exampleQuestions: [
            "Example question 1?",
            "Example question 2?",
            "Example question 3?",
          ],
        },
      });
    }
  };
 
  const observer = new MutationObserver((mutationsList) => {
    for (const mutation of mutationsList) {
      if (mutation.type === "childList") {
        const targetElement = document.getElementById("inkeepEmbeddedChat");
        if (targetElement) {
          addInkeepWidget();
        }
      }
    }
  });
 
  const observeDOM = () => {
    const config = { childList: true, subtree: true };
    observer.observe(document.body, config);
  };
 
  inkeepScript.addEventListener("load", () => {
    if (document.body) {
      observeDOM();
      addInkeepWidget();
    }
  });
 
  window.addEventListener("beforeunload", () => {
    observer.disconnect();
  });
</script>

Save custom code

Click on the Save button. Navigate to your web application and reload the page, to make sure the widget is installed correctly.

For a full list of customizations, check out the Embedded Chat documentation.

On this page