Build and deploy a Support Copilot for Zendesk
Copy page
Deploy an AI copilot into your Zendesk ticket sidebar that grounds its drafts in your team's internal context — prior resolved threads the customer-facing bot never saw — so agents get answers, sources, and next steps without leaving the ticket.
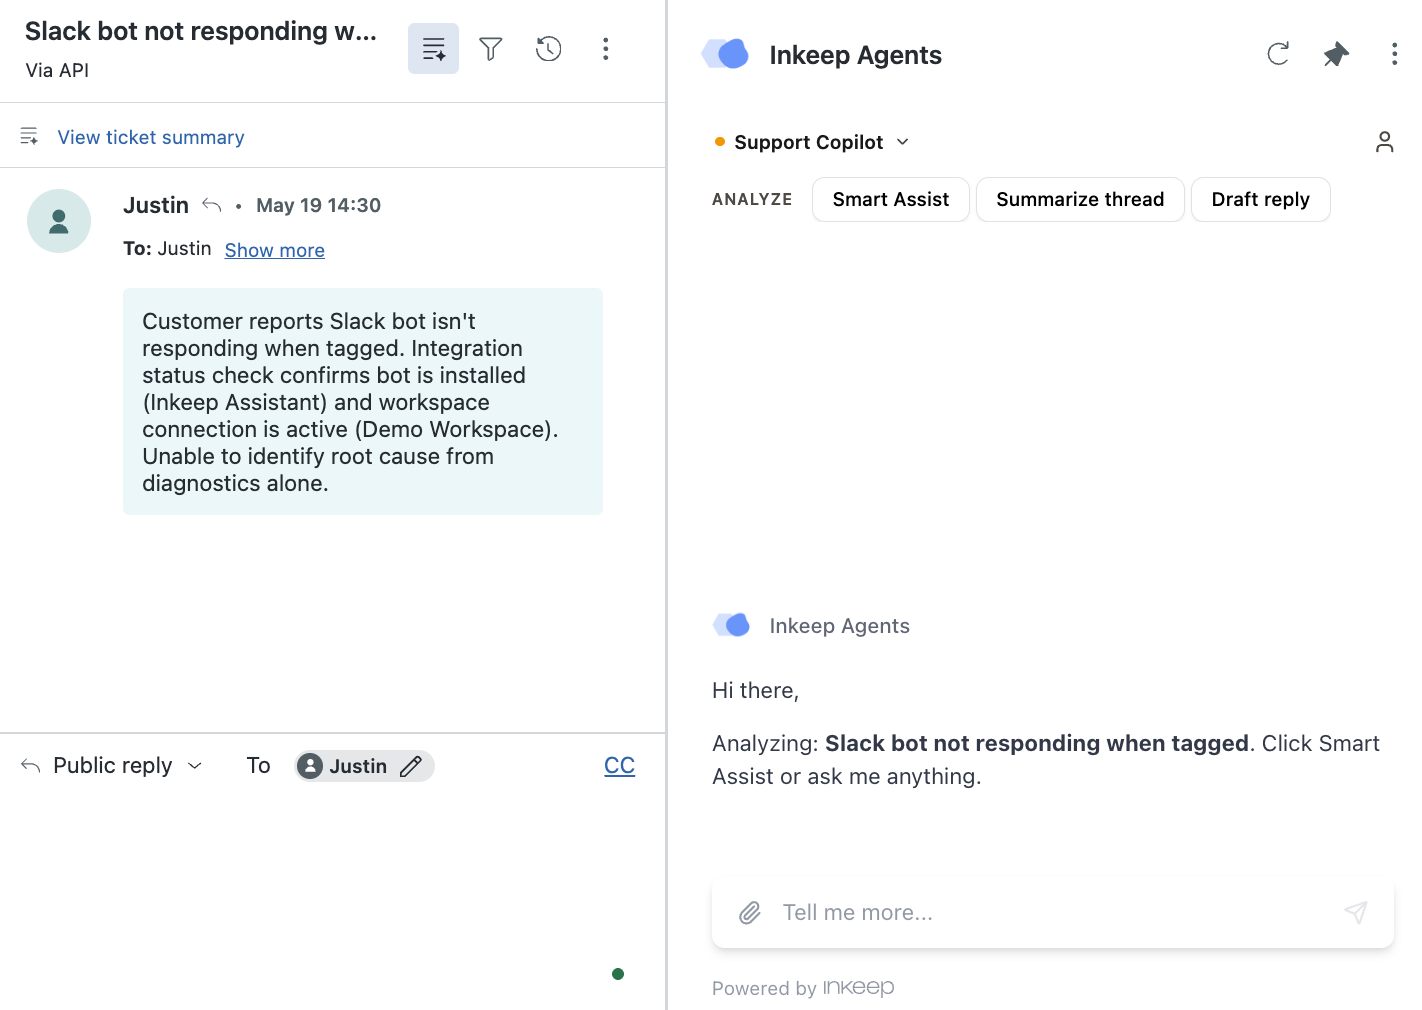
Overview
Who this is for: support teams giving their agents a copilot inside the Zendesk ticket sidebar. (For a copilot embedded in your own product for logged-in end users, see In-Product Copilot.)
Support Copilot puts an Inkeep agent right inside the Zendesk ticket sidebar, working alongside your support team. Its edge is the context it can reach that your customer-facing bot never could: your team's internal knowledge — prior resolved threads, internal Slack discussions, and the diagnostics behind past fixes.
When an agent opens a ticket and runs Smart Assist, the copilot will:
- Read the ticket — the conversation, metadata, and customer details — automatically
- Search your internal threads for the times your team already solved this exact issue
- Return structured assistance: a Draft Answer the agent can send, the Relevant Sources behind it (the internal thread and the public article that backed the fix), plus quick replies, clarifying questions, a thread summary, or follow-up tasks as the ticket needs
Everything happens inside the ticket the agent is already working in. No tab-switching, no copy-paste.
Prerequisites
- Access to Inkeep Enterprise — schedule a demo if you don't have it yet
- An internal knowledge source exposed as an MCP server — e.g. your internal Slack support channels or a store of past resolved tickets — that returns prior threads and the public source behind each fix. See Build Custom MCP Servers if you need to create one.
- A Zendesk account, with a Zendesk admin available to approve the app install
The internal-knowledge MCP is a custom server you build and deploy — it's where your team's prior resolutions live. Budget a little engineering time for it; everything after it is no-code in the Visual Builder.
Build the Smart Assist agent
Start by building the agent that powers the copilot: a single sub agent that searches your internal threads and helps the support agent reason about the ticket.
In the Visual Builder, go to the Agents tab in the left sidebar and click Create agent. Give it a name like Support copilot.
Click the Default Sub Agent on the canvas to configure it. Fill in:
- Name:
Smart Assist - Prompt: Paste the prompt below
- Base model: Leave the inherited default (e.g., Claude Sonnet 4.5).
Prompt:
Replace [Your Company] with your company name. This prompt is a starting point — tune the tone and the "how to help" steps to match how your team works.
Connect your internal knowledge
Smart Assist's advantage is the internal context it can reach. Expose that knowledge as an MCP server that gives the agent a search tool — in our example MCP that tool is search_internal_threads, returning a prior internal thread plus the public source that backed the fix. Your MCP may name its tool differently.
Each search result should carry the internal thread, a short resolution summary, and the public source URL that backed the fix — for example:
Smart Assist links public_source_url in the customer-facing Draft Answer and keeps the internal thread in Relevant Sources, flagged private for the agent.
Click MCP Servers in the left sidebar, then New MCP Server → Custom Server. Register your internal-knowledge server and give it a name (e.g., Internal Slack).
Go back to your agent canvas, drag an MCP block onto it, select your internal-knowledge server, and connect it to the Smart Assist sub agent.
Click Save Changes in the top right corner.
Your canvas should now show Smart Assist connected to the internal-knowledge MCP:
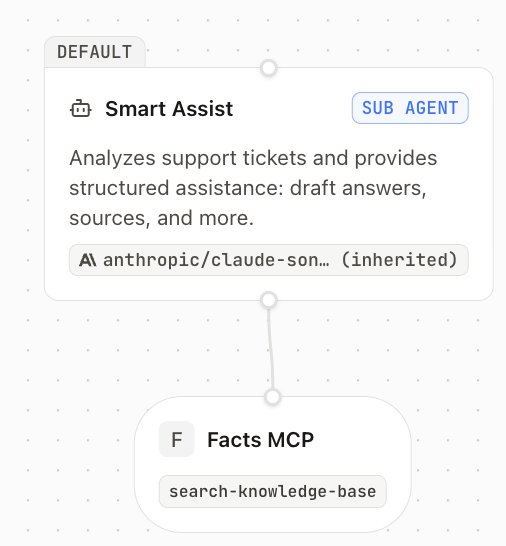
Need to build the internal-knowledge MCP itself? See Build Custom MCP Servers for wrapping any internal source — Slack, past tickets, a wiki — as a server the agent can search.
Add structured assistance
Smart Assist doesn't just reply in plain text — it returns rich cards the agent can act on. You define these as data components: name each one and give it a JSON schema, and the agent fills them in. Create them in the Data Components tab, then attach them to Smart Assist. See Data Components for the full walkthrough.
The two that carry this copilot:
- Draft Answer — a customer-ready reply the agent can send as-is, citing only public sources.
- Relevant Sources — the evidence behind the draft: the internal thread (marked private, for the agent's eyes only) and the public article (safe to link to the customer).
Add more as your team needs them — the demo also ships Quick Replies (one-click acknowledgements), Questions to Ask (clarifying questions when the ticket is thin), a Thread Summary for long threads, and Customer / Agent Tasks for open action items.
Keep customer-facing cards (Draft Answer, Quick Replies, Questions to Ask) free of internal links and PII. Internal context belongs only in Relevant Sources, flagged private for the agent.
Create a Support Copilot app
A Support Copilot app is how you deploy your agent into an external support platform like Zendesk. It connects your agent to the platform and defines the quick actions your team sees in the sidebar.
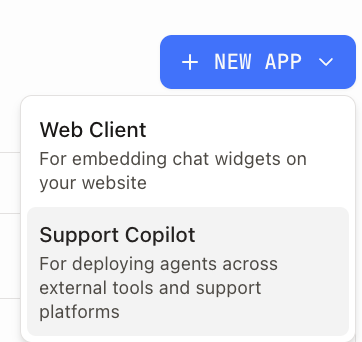
Go to the Apps tab in the left sidebar and click New App → Support Copilot.
Fill in the app:
- Name: A name your team will recognize (e.g.,
Support Copilot) - Default Agent: Select the
Support copilotagent you just built - Platform:
Zendesk - Quick actions: Action buttons shown at the top of the sidebar, organized into named groups. Each button sends a message to the agent on click. Create a group — e.g., ANALYZE — with Smart Assist, Summarize thread, and Draft reply.
Click Create App.
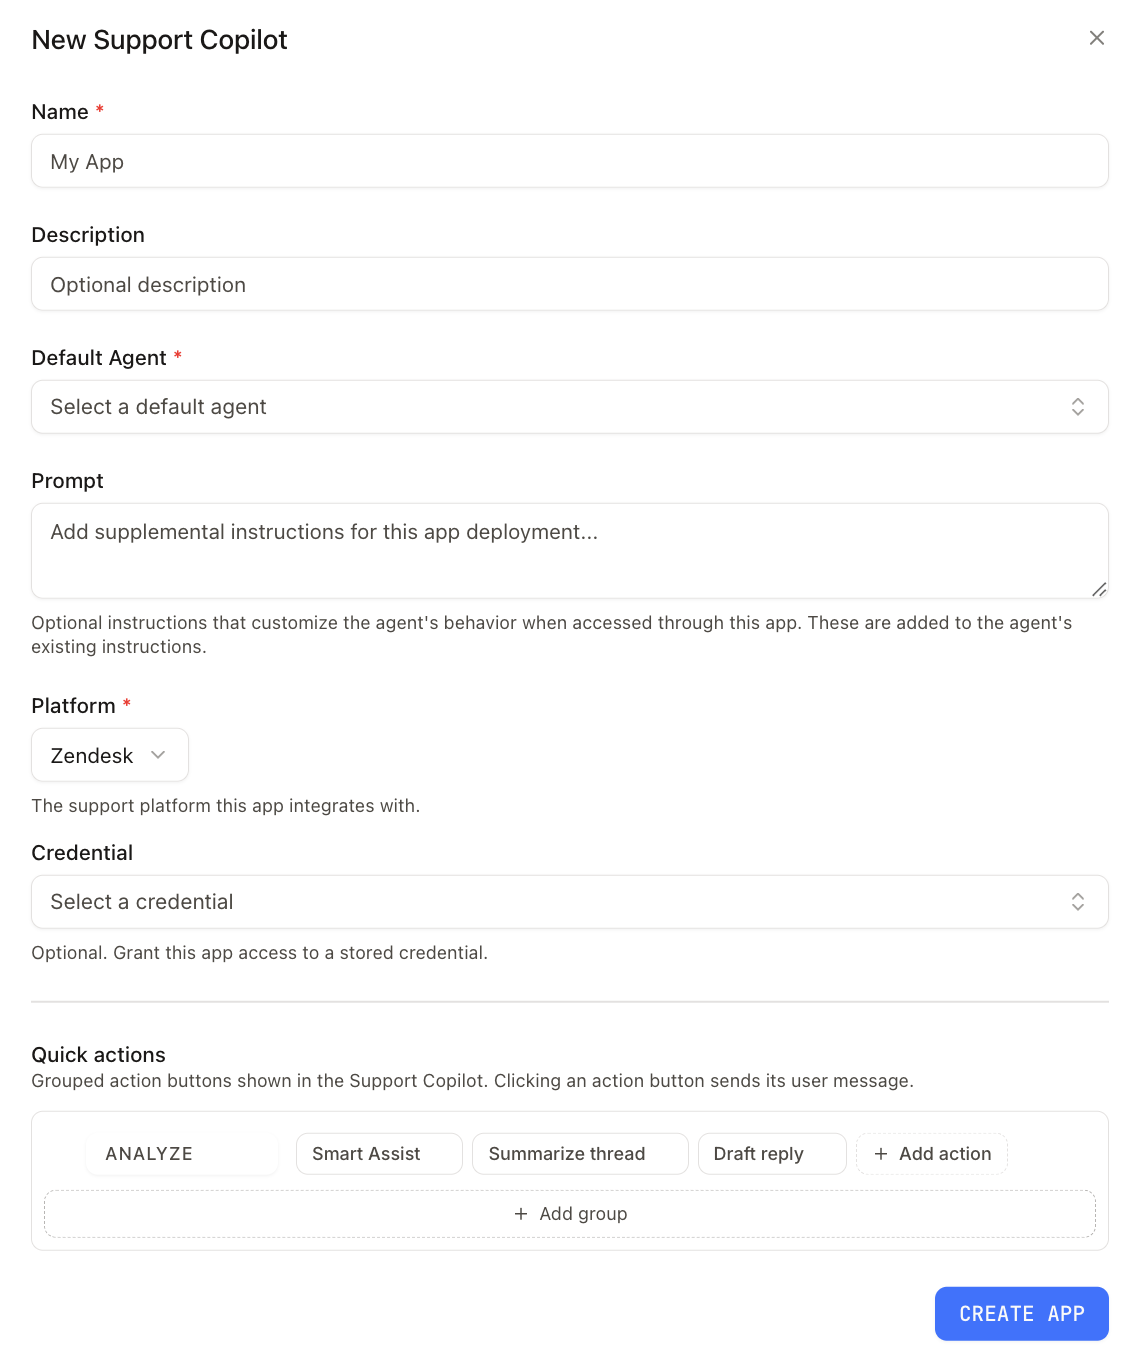
Quick actions are fully customizable — rename them, add your own, or group them. The message a button sends is exactly what your agent receives, so phrase it the way you'd ask ("Draft a reply to this customer").
Install in Zendesk
With the app created, install it in Zendesk so it appears in the ticket sidebar. You do this once per Zendesk account.
From the app, open the install instructions and click Open Zendesk Marketplace. Add the Inkeep Agents app to your Zendesk account. A Zendesk admin must approve the install.
Open any ticket in Zendesk and log in with your Inkeep account. The app detects your workspace automatically.
The Inkeep Agents app now appears in the ticket sidebar, with your quick actions at the top.
The in-app install dialog walks you through the same three steps:
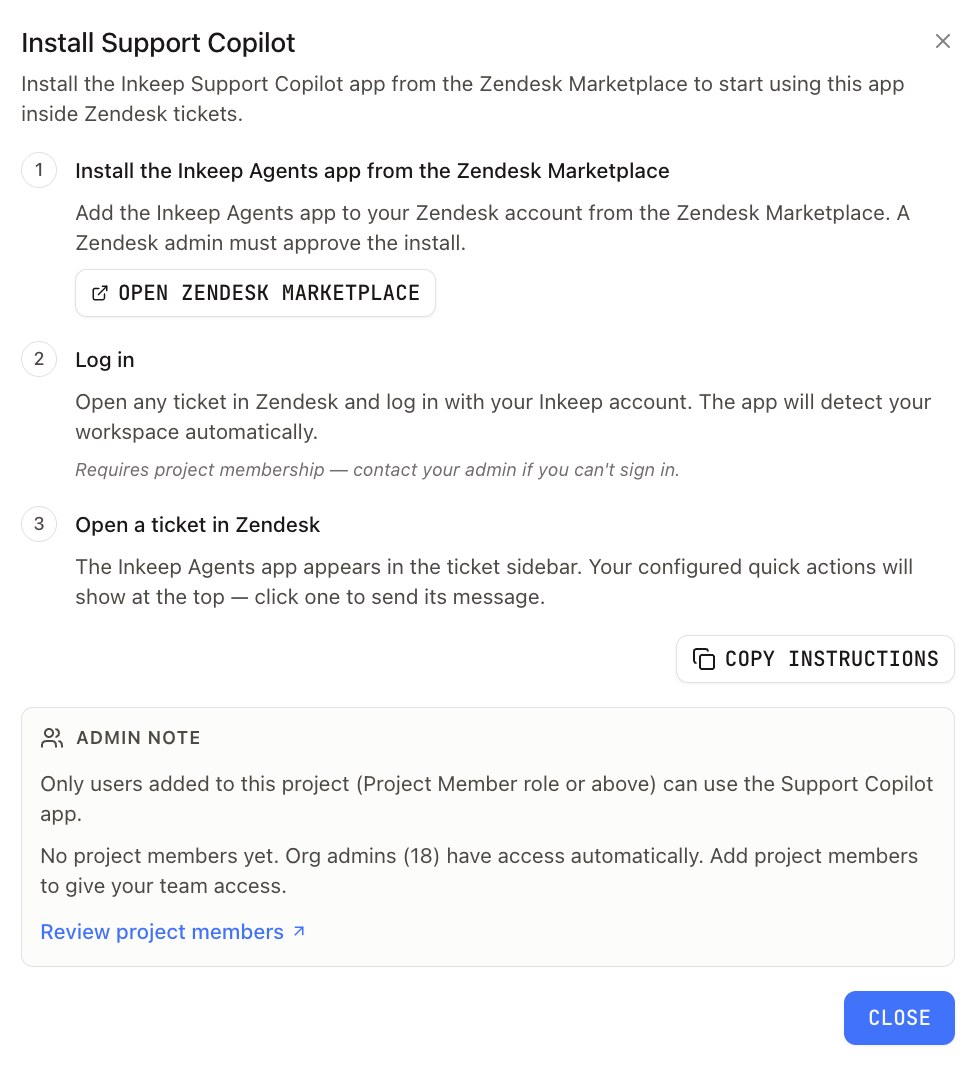
Only people added to the project (Project Member role or above) can use the Support Copilot app. Org admins have access automatically — add project members to give the rest of your team access.
Use it in a ticket
Open a ticket in Zendesk and find Inkeep Agents in the sidebar. The copilot greets you with the ticket it's looking at, and your quick actions are ready at the top.
Click Smart Assist and the copilot reads the ticket, searches your internal threads, and — when your team has solved it before — surfaces the prior fix: a brief note on the root cause, the Relevant Sources behind it, and a Draft Answer grounded in the public source, ready to send. Or type your own message to ask it anything about the ticket.
From here you can extend the copilot with more tools as your team needs them — for example, pulling up a customer's logs or checking live integration status. Each one builds on the same agent you just deployed.