MCP Servers
Copy page
Create MCP servers that agents can use to access external services.
MCP servers provide tools that your agents can use to interact with external APIs and services. Once created, these servers are automatically synced to discover available tools, which can then be added to your agent graphs.
For some tips on leveraging existing MCP server libraries or creating your own MCP server, see here.
Once you have an MCP server, now you can add it to your Agents.
Register an MCP server
-
Go to the MCP Servers tab in the left sidebar, then select "New MCP server".
-
Fill in the required server details:
| Field | Description |
|---|---|
Name | Server name |
URL | Endpoint URL of a remote MCP server |
Transport Type | Streamable HTTP or SSE protocol |
- Optionally, configure additional settings:
| Field | Description |
|---|---|
Image URL | Custom icon for the server (URL or base64 data URL) |
Credential | Authentication credential if the server requires it. Choose from existing credentials, or leave blank and add a credential later. For OAuth 2.1/PKCE flows, leave blank and use the Click to Login button in the server details page to authenticate |
- Click "Create" to create the server.
Viewing server details
After creating an MCP server, you can view its details:
- Click on your created MCP server from the list
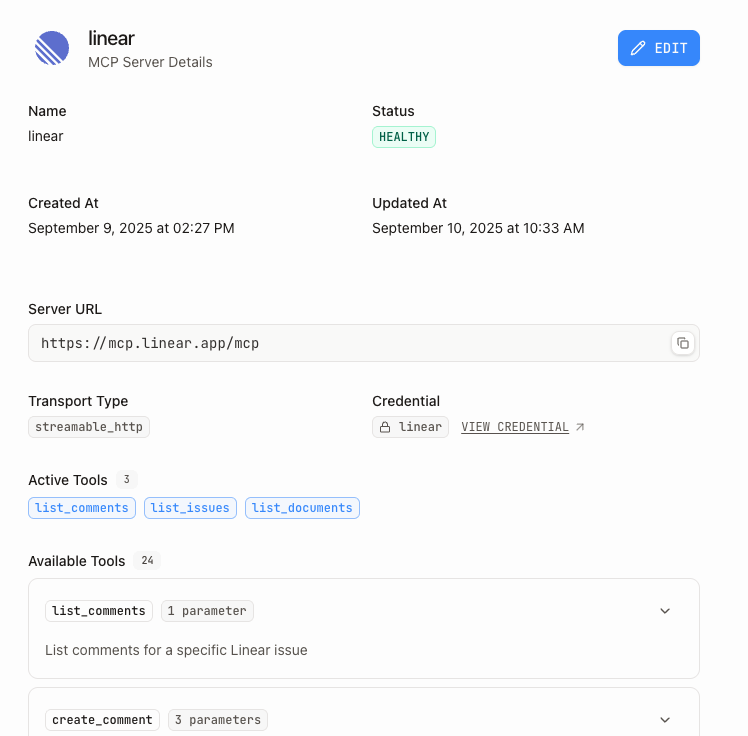
- The server details page shows:
- Server information - URL, transport type, creation date, etc.
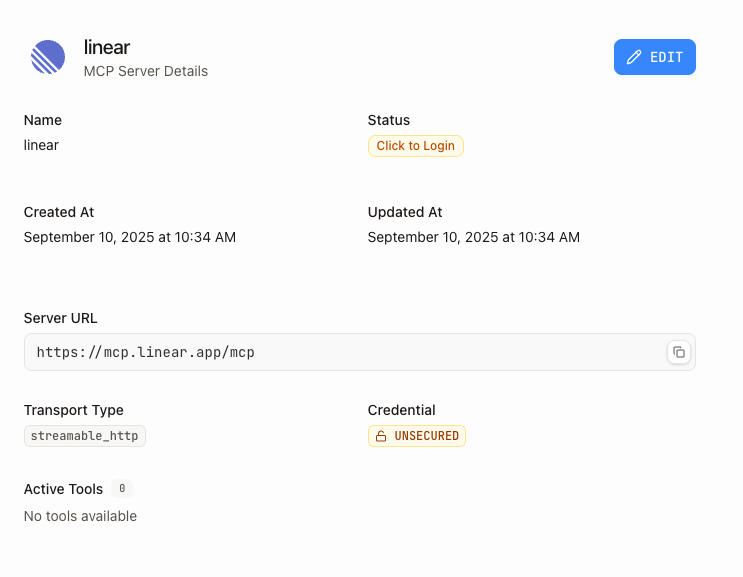
- Status - healthy, unhealthy, unknown, disabled, or shows a "Click to Login" button if OAuth 2.1/PKCE flow is detected
- Active tools - Currently enabled tools for the server
- Available tools - All tools discovered from the server with descriptions and parameters
Tool discovery requires a successful connection to the MCP server. If the server shows "Click to Login" in the status, use the button to initiate the authentication process.
Editing server settings
To modify an existing MCP server:
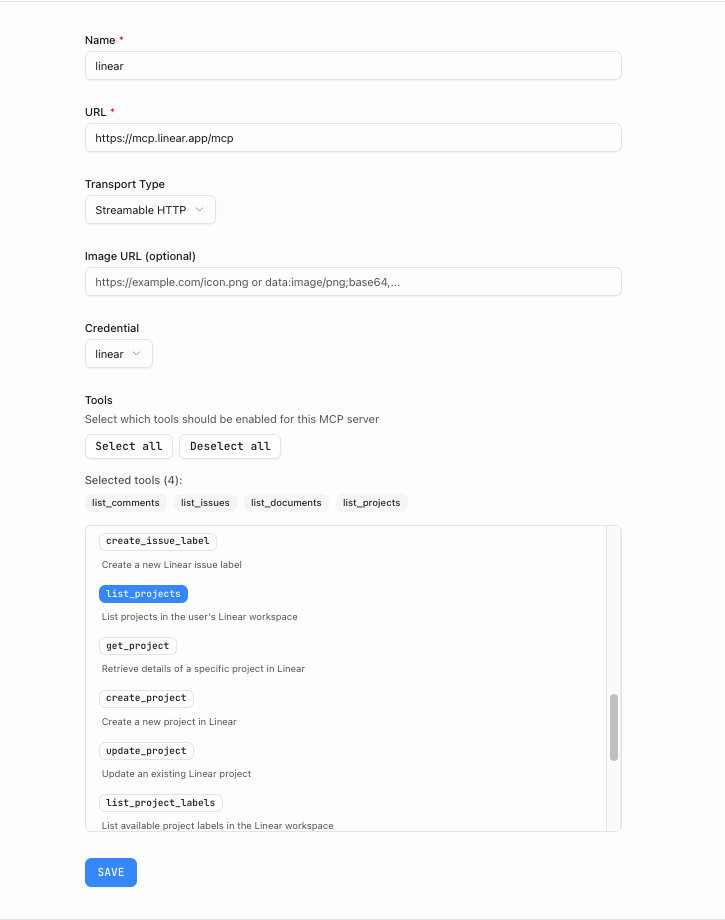
- From the server details page, click the Edit button
- The edit form shows all the same fields as creation, plus the ability to update Active Tools. By default, all available tools are enabled. You can select specific tools to enable.
- Click Save to apply changes
Authentication setup
If your MCP server requires authentication, you have two options: either use the "Click to Login" button to authenticate or manually create a credential to use with the MCP server.
OAuth 2.1/PKCE authentication
- Create your MCP server without selecting a credential
- Go to the server details page and click the "Click to Login" button
- Complete the OAuth authentication flow in your browser
- The credential will be automatically created and saved to your keychain
1-click Install MCP servers
Here's a list of popular service-maintained MCP Servers that support "1-click" install with OAuth 2.1/PKCE authentication.
Manual credential setup
- Create a credential in the Credentials section. The credential can be API Key, Bearer Token, Basic, OAuth 2.0, etc.
- When creating or editing your MCP server, select the credential from the dropdown
- The credential will be automatically used when connecting to the server
Finding more remote MCP servers
For additional remote MCP servers you can connect to:
- Anthropic's Remote MCP Servers - Official documentation with curated third-party remote servers
- Awesome Remote MCP Servers - Community-curated list of high-quality remote MCP servers
Using stdio-based MCP servers
The Visual Builder requires Streamable HTTP or SSE transport to connect to MCP servers. If you have an MCP server that runs in stdio mode locally, you can use the following setup to connect to it.
Setup outline
- Deploy your stdio -> Streamable HTTP/SSE bridge (locally or cloud)
- Set environment variables (API tokens, etc.)
- Verify it's running (i.e. on port
4000,4001, etc.) - Add to Visual Builder:
- URL:
http://localhost:4000/mcp(or your server URL) - Transport Type:
Streamable HTTPorSSE
- URL:
Example using mcp-proxy
- Get familiar with mcp-proxy - proxy for MCP servers that use stdio transport
- Supabase MCP server
- Run the server locally:
- Add to Visual Builder with the following settings:
- URL:
http://localhost:4444/mcp - Transport Type:
Streamable HTTP
- URL:
Adding servers to graphs
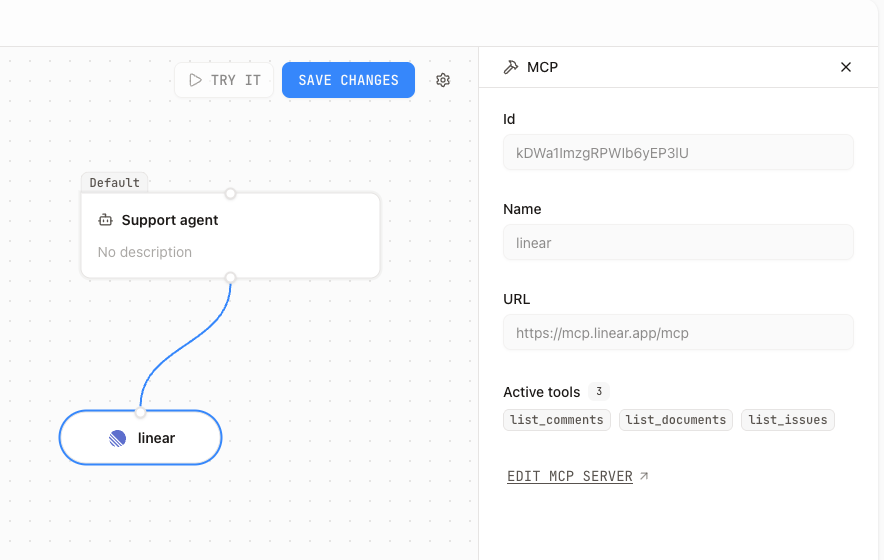
Once you have created an MCP server, you can add it to your graphs:
- Go to the Graphs page
- Drag and drop an MCP server into your graph
- Connect the MCP server to an agent by dragging from the server's connector to the agent
- Your agent can now use the tools provided by that MCP server
For detailed instructions on working with MCP servers in graphs, see the Graphs page.